Pages

Saturday, November 28

The money tape!

Well, I've seen a few other people do this and have always wanted to try - make a wallet out of a cassette tape!

So here's how I went about it...

First I bought some old tapes from New Harvest Opshop - kids tapes are bright and colourful, so try to find these!


Nextly I went about splitting the tape in half, some have screws but mine was glued. Do this with a sharp knife, but PLEASE BE VERY CAREFUL I don't want to be responsible for chopped off fingers.
This is what you'll find inside!


Afterwards scrape off the sticker (soaking tape in warm water for a bit helps) If you LOVE the sticker - keep it on!


To get the gummy glue off use a smidge of Chemico - works miracles!


Find some material and a cool zip and measure around the cassette approximately.


Fold in edges and sew in a contrasting colour - to make it look cool


I found this really cute ^u^ ribbon and taped is onto the inside of the little window!


Next mark the corners of the cassette on to the zip and pin in place.


Then sew the zip on!! I didn't even use a zipper foot and it turned out fine. (The zip needs a lot of give in this wallet - the wider it is the more money/cards you will fit in!)


Nextly glue the zip and material to the inside of the tape - I used hot glue gun


Tuck in the zip ends etc.


Then I glued some more of the ribbon to tidy up the underside and make it look like the tape!


Add your cards/money


Zip it up and you are ready to go!
IMPORTANT Make sure you keep checking that the case zips and unzips throughout making this, as it would be terrible if some glue got in the way of the zip and it broke!!

If you want you can doodle on the case too... looks pretty cool.
I might experiment next with a hinge one, as the zipper one doesn't open that far.

Have fun!

Thursday, November 26

CHILAX this summer with some SORBETY goodness

OH MY
The other day was so hot so I decided to cool down the hip way, by eating sorbet. All the cool kids will be doing it, just you wait!

Sorbet is super easy and inventing your own flavors is a synch!
I decided upon making LEMON, LIME & BASIL FLAVOUR - pretty much like a frozen cocktail. YUMMO


First get lots of lemons, and juice all the juice outta them! Zest them a bit too (limes too if you have them-I just used the stuff from a bottle)


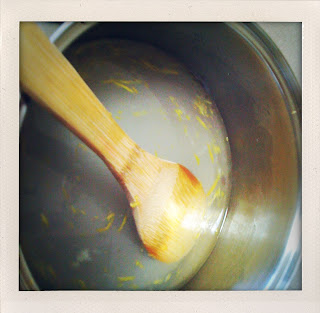
Boil up a cup of water with a cup of castor sugar add the rind too - simmer for 4 mins


Crush crush crushy up a WHOLE bunch of basil leaves


Take saucepan off the heat and add basil to the liquid to INFUSE and add a splash or two of gin to the mix.


After 10 or so mins of infusing, strain into a container and FREEZZZZZZZZEEEEEEEEE!!!!


It might take 3+ hours to set, but I left mine overnight...

SERVE UP!

Wednesday, November 25

Because brownie loves you too <3

SPECIAL BIRTHDAY BLOG FOR SPANKY! HAPPY BIRTHDAY SPANKY!! <3

Well as well as crafty stuff on this blog, 'second courses' is to do with...you guessed it...FOOD! So here is the first recipe! YUMYUM

Now a few days ago I went to a friends BYO dessert night... and I slaved away making brownie. Yet when I got there there were 2 other people that had also brought brownie :-(
Now any normal person would firstly think 'well that's easy, my brownie is the yummiest one, everyone will eat it!' But the truth is, even if you know your brownie is the yummiest, others won't...so you need to somehow get them to try your one first... here is the MAGICAL how to:


This is what you will need:


200g dark chocolate
250g butter
4 eggs
1 3/4c brown sugar
1 1/3c flour
1/3c cocoa
1/4tsp baking powder
1 1/2c raspberries

Melt chocoalatey with greasy butter in saucepan


When it's all smooooooooooooth put it in bowl then add sugar and eggs...then MIXMIXMIX


Next it's time to get sifty! Sift flour, cocoa and baking powderrr into the bowl...MIXMIXMIX


ADD RASPBERRIESSSSSSSSSSSSssss then put in tins like these ones to be precise>>>


and then COOK COOK COOK


On 180C for 30 MINUTES

In the meantime I played with the puppies - they could smell all that chocolate...mmm...


When all cooked...


...the trick to getting people eating your brownie first...
cut into cute shapes!


VOLIA!
YOU LOVE BROWNIE AND BROWNIE LOVES YOU <3


I promise next time to make something healthier for you...like my favourite vegan cookies

Go climb a tree!

I think climbing trees can be a hobby... so I've posted this to inspire you to go climb a tree near you, it's been too long, really it has.

There was such a nice view!


I was so hard out I ended up bleeding!


So I left my mark... kinda war-paint styles


My house roof


Now it's your turn... GO CLIMB A TREE

Monday, November 23

Pegs are not only teeth...

Well since my sister just got married, I've shifted into her old room. There was a lot of bare wall space so I decided to put up some photographs.

On Monday I acquired some quaint wooden pegs and decided to use them to make a photo string - just like when I was in photography class, hanging photos to dry!

It is very easy to do, and looks rather lovely.

Have handy some twine, scissors, pegs (wooden look best) and of course a selection of photographs!


Pin up one end of the twine or tie it to something like a curtain rail. Thread the twine through the loop in the peg spring (this keeps the pegs on the string and lets you open and close them as often as desired!)


Next affix the other end of the twine to something like another curtain rail (give it a little slack) and attach photos, notes, cards or whatever!


If you have left over pegs try something like this guy...


More peggy crafts to come in the near future :-D

Bordem and birds


Well I was slighty bored in class so to keep my mind active I drew this birdish thing. It's maybe a bit like Buckbeak?

Sunday, November 22

Asia knows how to party

Not only does Asia have great looking, mouth watering candy like this:


They also invent cute stuff like this sticky tape:


I recommend it for making your giftys look extra cute this Christmas!
I bought 8 rolls of the stuff from the new junk store upstairs in Ric Mall. Only $2 for all 8 I think!

FUNKY SHEWS


All I did was buy $15 white canvas shoes and drew on them with a permeant marker. Easy, fun and effective! Makes a great gift!


I did these shoes a while ago.

Old dress, new dress.

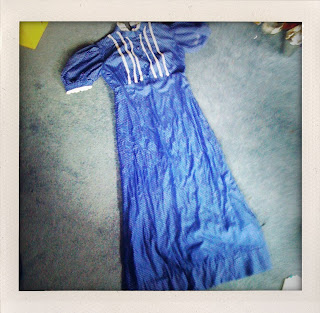
Last weekend I was rummaging through my top closet and came across this spotted blue dress. I bought it a few years ago at an opshop to use as a costume.


I decided it wasn't half bad, all it needed was some sprucing up.

So today my post will show you how to make a new dress from an old one. This only took an hour or so.


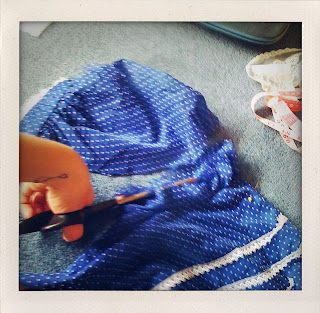
First chop the bottom of the dress, making it a cute summery length. NB. Just like when cutting hair, measure both sides to make sure it's even.


Next over-lock each of the edges so it doesn't fray (if you don't have an over-locker zig-zag the edge instead!)


Next neatly pin and hem the skirt, I've used 5.0 stitch to get close to the edge.
You may want to slip stitch the hem too to keep it in place.


In my sewing box I found a piece of lace that I thought would look nice on the bottom of the skirt. I attached this in a somewhat cavalier fashion. Do what you must!


Now how much better does that look!


Now to attack those puffy sleeves, as I'd have to be a Swedish model to pull that look off)
Place a pin where you want to hem to. Chop sleeves leaving a good amount of material to hem with.


Pin it and sew it!


Finish with a quick over-lock to get rid of the excess sleeve.

Then press it, and if you feel like it, slip stitch again (I didn't, I'm too lazy)


AND WE ARE ALL DONE!


If you want, add a feature or two... I thought a white bow might look nice at the front or the back.


Sexy summer chic, recycling is easy!
Related Posts Plugin for WordPress, Blogger...